Hello Dev,
In this tutorial, you will learn laravel amazon s3 file upload. you'll learn how to upload file to s3 using laravel filesystem. you will learn laravel upload directly to s3. if you have question about how to get image from s3 bucket in laravel then i will give simple example with solution.
In this tutorial, i will show you step by step how to upload files and images in amazon s3 server using laravel. you can use this example with laravel 6, laravel 7, laravel 8, laravel 9 and laravel 10 version.
you have to follow few step. i will also show you how to create s3 bucket account and use it with laravel. then i will create simple image upload example so you will understand. let's follow bellow steps:
Step 1: Create S3 Bucket
First you need to create bucket and user so let's follow bellow step:
1. Go to Amazon Web Service Console and Login.
2. Click on S3 from Service Lists
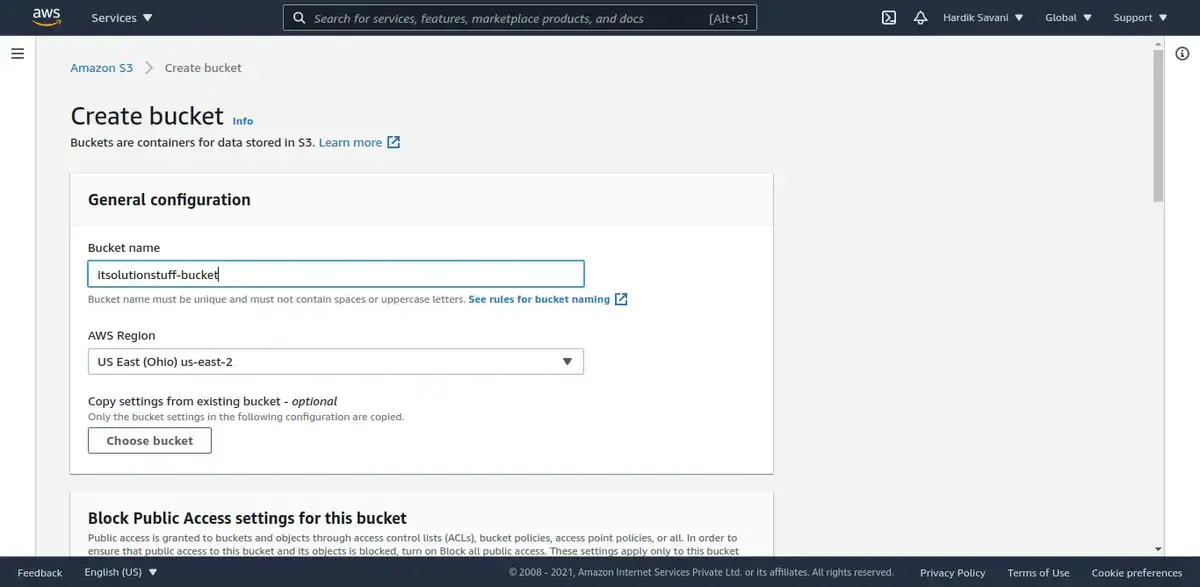
3. Click on "Create Bucket" button and you will found bellow forms. you can enter your bucket name there.
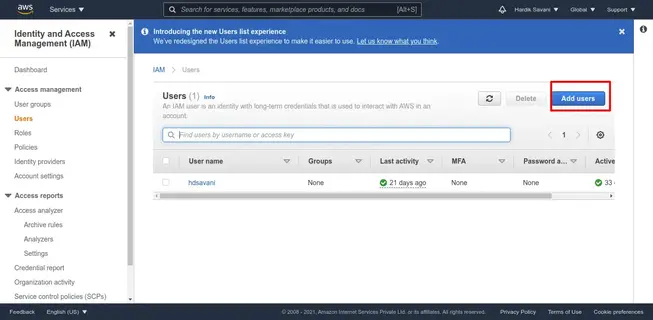
4. Create Create IAM User. Click here to create IAM User.

5. Click on "Create User" button as bellow show you.
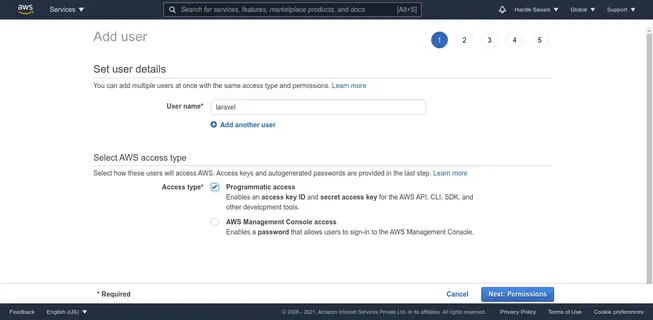
6. Next Add User Name and select "Programmatic access" from access type. then click on next.
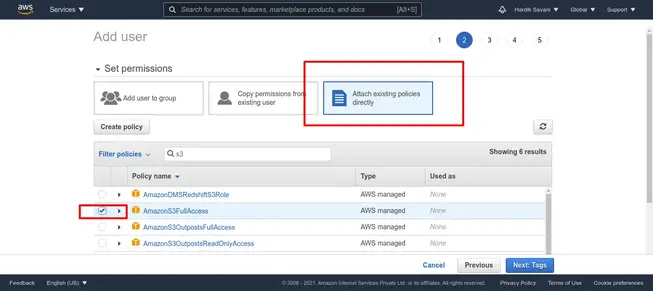
7. Next Select “Attach Existing Policy Directly” and choose "AmazonS3FullAccess" from permission link.
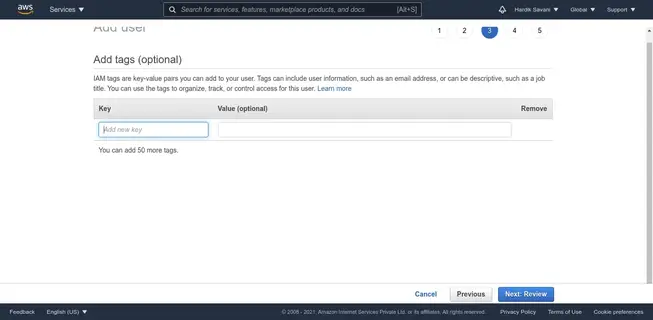
8. It's optional so you can skip and click to next.
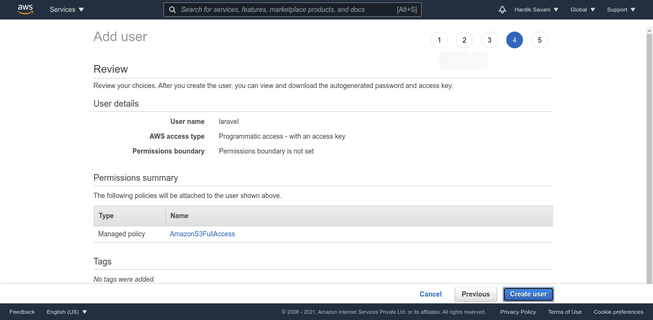
9. You can view user details and then click on "Create User" button.
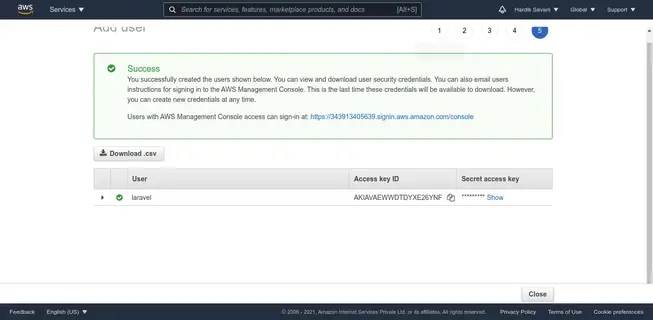
10. Now you will see created user in link. there is a "Access Key ID" and "Secret Access Key" that we need on .env files.
Step 2: Install Laravel 8
First of all, we need to get fresh laravel 8 version application using bellow command because we are going from scratch, So open your terminal OR command prompt and run bellow command:
composer create-project --prefer-dist laravel/laravel blog
Read Also: Laravel CKeditor 5 Image Upload Tutorial Example
Step 3: Install Amazon S3 Composer Package
If you have not installed amazon s3 package then you have to install s3 composer package by using following command:
composer require --with-all-dependencies league/flysystem-aws-s3-v3 "^1.0"
Step 4: Configure AWS S3 Credentials
Now you need to add aws credentials in your .env file as like bellow:
.env
AWS_ACCESS_KEY_ID=AKIAVAEWWDTDY...
AWS_SECRET_ACCESS_KEY=Zp/wgwj46SAC....
AWS_DEFAULT_REGION=us-east-2
AWS_BUCKET=itsolutionstuff-bucket
AWS_USE_PATH_STYLE_ENDPOINT=false
Step 5: Create Routes
In next step, we will add new two routes in web.php file. One route for generate form and another for post method So let's simply create both route as bellow listed:
routes/web.php
use Illuminate\Support\Facades\Route;
use App\Http\Controllers\ImageUploadController;
Route::get('image-upload', [ ImageUploadController::class, 'imageUpload' ])->name('image.upload');
Route::post('image-upload', [ ImageUploadController::class, 'imageUploadPost' ])->name('image.upload.post');
Step 6: Create ImageUploadController
In third step we will have to create new ImageUploadController and here we have to write two method imageUpload() and imageUploadPost(). So one method will handle get method another one for post. So let's add code.
app/Http/Controllers/ImageUploadController.php
namespace App\Http\Controllers;
use Illuminate\Http\Request;
class ImageUploadController extends Controller
{
/**
* Display a listing of the resource.
*
* @return \Illuminate\Http\Response
*/
public function imageUpload()
{
return view('imageUpload');
}
/**
* Display a listing of the resource.
*
* @return \Illuminate\Http\Response
*/
public function imageUploadPost(Request $request)
{
$request->validate([
'image' => 'required|image|mimes:jpeg,png,jpg,gif,svg|max:2048',
]);
$imageName = time().'.'.$request->image->extension();
$path = Storage::disk('s3')->put('images', $request->image);
$path = Storage::disk('s3')->url($path);
/* Store $imageName name in DATABASE from HERE */
return back()
->with('success','You have successfully upload image.')
->with('image', $path);
}
}
Step 7: Create Blade File
At last step we need to create imageUpload.blade.php file and in this file we will create form with file input button. So copy bellow and put on that file.
resources/views/imageUpload.blade.php
laravel File Uploading with Amazon S3 - ItSolutionStuff.com.com
rel="stylesheet"
href="https://maxcdn.bootstrapcdn.com/
bootstrap/4.0.0/css/bootstrap.min.css">
class="container">
class="panel panel-primary">
class="panel-heading">
laravel File Uploading with Amazon S3 - ItSolutionStuff.com.com
class="panel-body">
@if ($message = Session::get('success'))
class="alert alert-success alert-block">
type="button" class="close" data-dismiss="alert">×
{{ $message }}
src="{{ Session::get('image') }}">
@endif
@if (count($errors) > 0)
class="alert alert-danger">
Whoops! There were some problems with your input.
- {{ $error }}
@endif
action="{{ route('image.upload.post') }}" method="POST" enctype="multipart/form-data">
@csrf
class="row">
class="col-md-6">
type="file" name="image" class="form-control">
class="col-md-6">
type="submit" class="btn btn-success">Upload
Now you can run and check it.
Now we are ready to run our example. so run bellow command so quick run:
php artisan serve
Now you can open bellow URL on your browser:
localhost:8000/image-upload
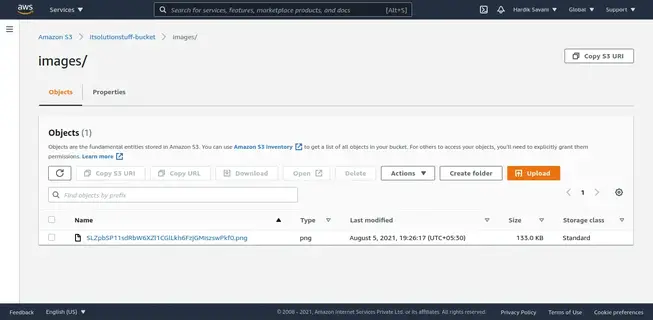
Output:
S3 Uploaded Image:
I hope it can help you...


Leave a Comment
No Comments found