How to integrate eBay API with Laravel 6.x
Before a month ago I was trying to implement eBay API for one of my customers web site which is an e-commerce site. At that moment I really didn't had any idea about this. So for few days I surfed the web to find something resourceful for my requirement but It was really hard to find any documentation regarding eBay API integration in Laravel . However with the help of YouTube I was able to fulfill my requirement partially with pure php. So with that knowledge I was able to integrate eBay API with Laravel. So I’m here to share my knowledge.

Steps to be followed
- Make a eBay developer account & create APP ID( this take couple days to be authorized))
- Install Laravel 6.x
- Insert data into table / Find eBay item numbers
- Find the API you need ( In here I do test Traditional Shopping/Buying API with call type GetSingleItem ) However all other APIs work same as this.
- Automating the front-end view with DB ebay_item_id.
- Final result
Step 01 — Make an eBay developer account
To fetch data from eBay we should pass a valid key with the request . For that we should signup with eBay developer and then after eBay team approve our account we can generate a private key which will be used to request data .
a). Go to https://developer.ebay.com/ and then register with eBay developer account.
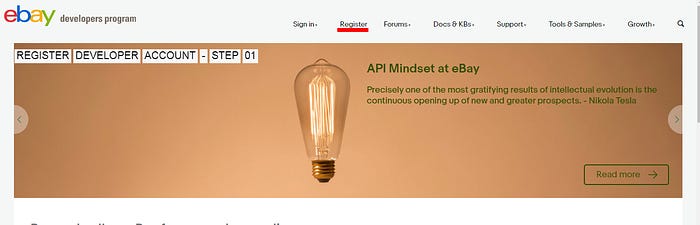
Go to eBay developer portal and click register to start registration
Fill the form and confirm the email verification. Now developer part is OK. Now we have to wait till eBay developer’s program until review our account.

Wait till they review and approve your account
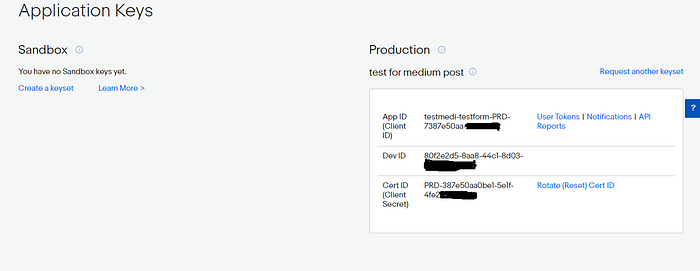
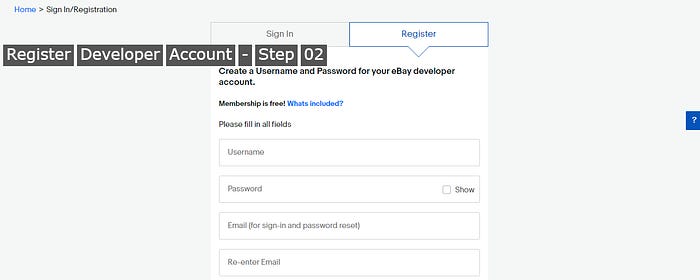
After eBay developers review your account then you can login to your developer account. Login to it and make APP ID . This will generate a unique key for your account. OK now we have completed our part at eBay developer account. Now time to make back-end and front-end in Laravel.
Step 02 — Install Laravel 6.X
Now what we have to do is to install Laravel 6.x to start coding( I’m not gonna instruct here for ‘How to install Laravel’. You can find Laravel document here.
Step 02.1— Creating DB and table to store details (I’m creating this table to store eBay item number)
Editing .env file (for DB credentials )
In here I’m making a DB named as ‘ebayapitest’
DB_CONNECTION=mysql
DB_HOST=127.0.0.1
DB_PORT=3306
DB_DATABASE=ebayapitest
DB_USERNAME=root
DB_PASSWORD=
Making db table (Let’s store eBay item numbers)
php artisan make:model EbayApiTest -a //This will create model,migration and the controller
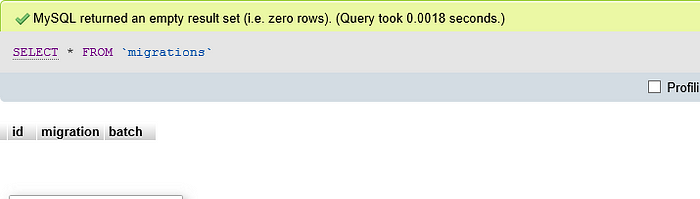
Edit and migrate the table
public function up(){
Schema::create('ebay_api_tests', function (Blueprint $table) {
$table->bigIncrements('id');
$table->string('ebay_item_id');
$table->timestamps();
});
}
Now lets migrate this to database
php artisan migrate
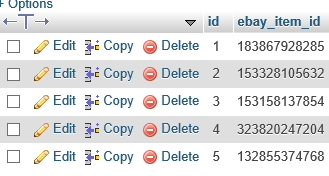
Find and insert eBay item numbers
OK now lets add some eBay items into our database table.
In here I’m' not making a form or view to insert data. I’m just inserting data via Laravel Tinker . You can use any method to insert data into this table.Hens my aim here is to share my knowledge regarding eBay API integration with Laravel. So I let you to decide how to insert data. 😜
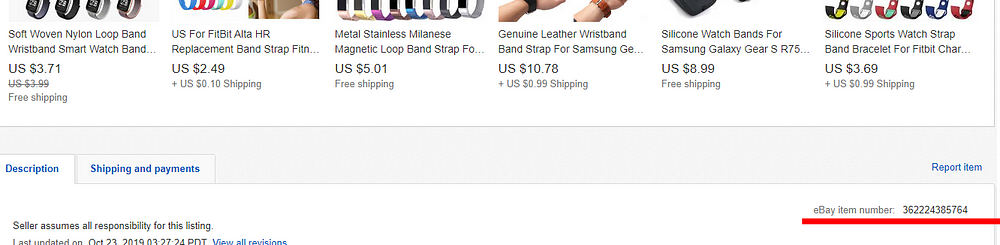
As in the upper image you can see eBay item number for the related product. So insert few eBay item numbers to the database table we created.
Step 04 — Integrating API with Laravel
OK before coding lets collects things we need to start coding.
- GuzzleHttpClient — Guzzle is a PHP HTTP client that makes it easy to send HTTP requests and trivial to integrate with web services. (check this medium post for more)
- eBay sample code for GetSingleItem callname
- Make the controller
step 04.1 Install GuzzleHttpClient to Laravel via composer
composer require guzzlehttp/guzzle
composer update
step 04.2 eBay sample code
http://open.api.ebay.com/shopping?
callname=GetSingleItem&
responseencoding=XML&
appid=YourAppIDHere&
siteid=0&
version=967&
ItemID=180126682091&
IncludeSelector=Description,ItemSpecifics
step 04.3 code the controller
public function index()
{
$appid = 'YOUR APP ID HERE'; //Your appid$client = new Client(); // Initializing a new client //code from Guzzle documentation and ebay developer documentation$result =
$client->request('GET','http://open.api.ebay.com/shopping?'
. 'callname=GetSingleItem&'
. 'responseencoding=XML&'
. 'appid=' . $appid . '&'
. 'siteid=0&'
. 'version=967&'
. 'ItemID=153328105632'//This id to be fetched via db
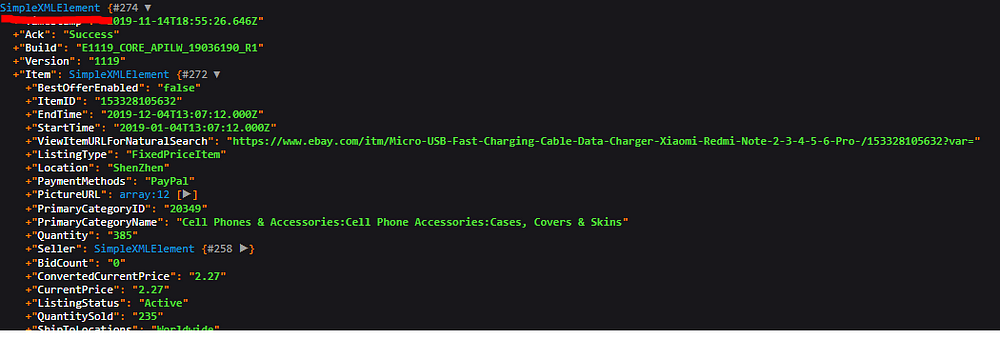
. '&IncludeSelector=ItemSpecifics,ShippingCosts,Details');//Since $result return XML string I use simplexml_load_string() method to convert it into a object$xml = simplexml_load_string($result->getBody());//Now I use json_encode() to convert $xml into a JSON string$json = json_encode($xml);//Now I decode $json into a array with using json_decode($val, TRUE) . RATHER THAN WORKING WITH AN OBJECT I FEEL ARRAY IS MUCH EASY. $jsonResultToArray = json_decode($json, TRUE);//dd($jsonResultToArray);
//For testing I have dd() final result.}
For better understanding
dd(simplexml_load_string($result->getBody()))
//OR as in the code
dd($xml);
//var_dump($xml) this will output as a object
Output
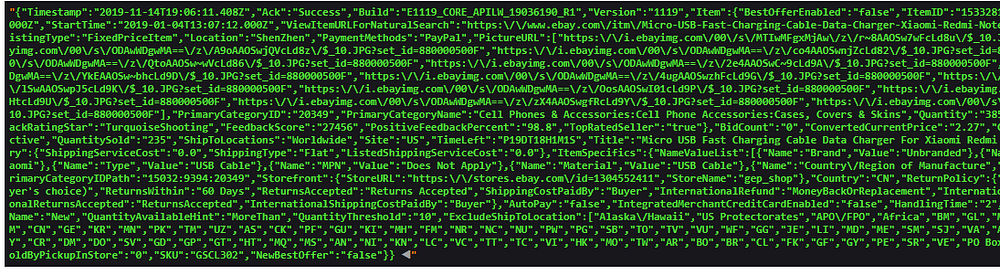
dd($json) //OR
dd(json_encode($xml)) // OR
dd(json_encode(simplexml_load_string($result->getBody())))
//all of these out put the same
//var_dump($json) this will output as a String
output
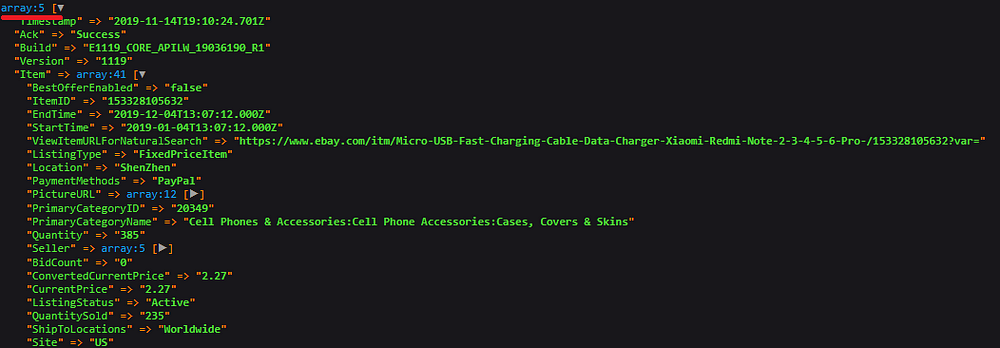
dd($jsonResultToArray); //You can find a array 😋
Step 05 — Automating the front-end view with DB ebay_item_id.
OK I’ll make a simple front-end view to view the data pass through the controller. What do I do here is that fetch the product image , name and price only. But if you go through the array we generated you can see that there are lot of more data which you can use.
Step 05.1 completing the controller
In here what I have done is first I fetch all available item IDs from db and then loop it inside a foreach with passing item ID to api call and then push those data to a array and pass that array to view.
public function index()
{
//Fetch all available item numbers from DB table
$ebayItemIDs = EbayApiTest::all();$appid = 'YOUR APP ID HERE'; //Your appid$variableForFrontEnd = []; // creating a empty array to store data . This variable will be passed to view//loopingforeach ($ebayItemIDs as $ebayItem) {$client = new Client(); // Initializing a new client//code from Guzzle documentation and ebay developer documentation$result = $client->request('GET', 'http://open.api.ebay.com/shopping?'. 'callname=GetSingleItem&'. 'responseencoding=XML&'. 'appid=' . $appid . '&'. 'siteid=0&'. 'version=967&'. 'ItemID=' . $ebayItem->ebay_item_id . '&'. 'IncludeSelector=ItemSpecifics,ShippingCosts,Details');//Since $result return XML string I use simplexml_load_string() method to convert it into a object$xml = simplexml_load_string($result->getBody());//Now I use json_encode() to convert $xml into a JSON string$json = json_encode($xml);//Now I decode $json into a array with using json_decode($val, TRUE) . RATHER THAN WORKING WITH AN OBJECT I FEEL ARRAY IS MUCH EASY.$jsonResultToArray = json_decode($json, TRUE);//push values to arrayarray_push($variableForFrontEnd, $jsonResultToArray['Item']);}return view('index', ['variableForFrontEnd' => $variableForFrontEnd]);}
Step 05.2 completing view
In here passed variable from the controller to view will be looped inside a foreach with some bootstrap.
<html><link href="https://stackpath.bootstrapcdn.com/bootstrap/4.4.1/css/bootstrap.min.css" rel="stylesheet" integrity="sha384-Vkoo8x4CGsO3+Hhxv8T/Q5PaXtkKtu6ug5TOeNV6gBiFeWPGFN9MuhOf23Q9Ifjh" crossorigin="anonymous"><body class="bg bg-light"><div class="container"><div class="row">@foreach ( $variableForFrontEnd as $item)<div class="col-sm-3 p-3 my-2 bg bg-white border "><img src="{{ $item['PictureURL'][0]}}" class="img-fluid"><h6 class="mt-3"> {{$item['Title']}}</h6><br><p>Price $ <span class="text-dark h3"> {{$item['ConvertedCurrentPrice']}}</span></p></div>@endforeach</div></div></body></html>
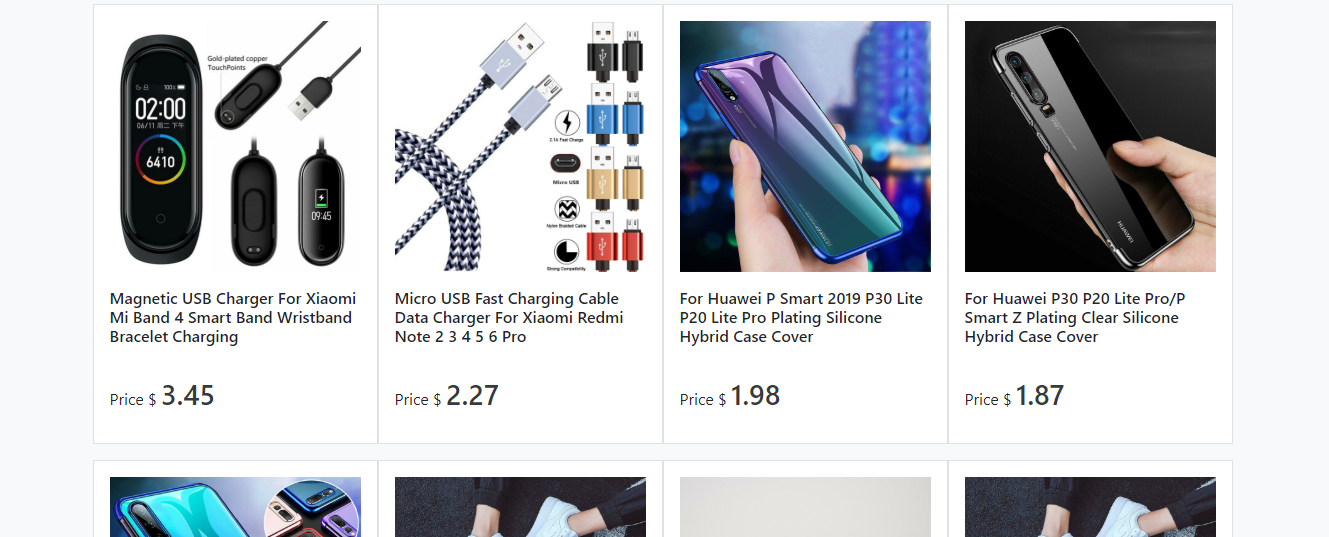
Step 06 — Final Result
If you have completed above mentioned steps properly now you should be able to have a view like below
Thanks


Leave a Comment
No Comments found